Automating my tortoise’s home
I recently bought a tortoise (named Burrito) as a little buddy in my office. He’s a cool dude, only about 18 months old so pretty small. Due to work and kid commitments i was struggling to remember to turn his heating on, so i needed a way of automating this.
The plan
The idea behind this initially is to get some automated heating in his house (which is a largish tortoise table at the moment). Ideally this would be controlled within homeassistant which will allow me to easily monitor and alert on the state of Burritos enclosure. I wanted to be able to monitor both the state of the heat-lamp and also the temperatures around the enclosure mainly 3 zones, his basking area which would be the warmest, his bed area and his cool area.
I wanted this to be as tidy as i could make it with every attached to his table to keep wires away from other animals/kids.
I also want to eventually add a camera attached to a raspberry pi so i could watch what he is up to in the future. So i wanted to ensure i included provisions for that as well.
Hardware Used
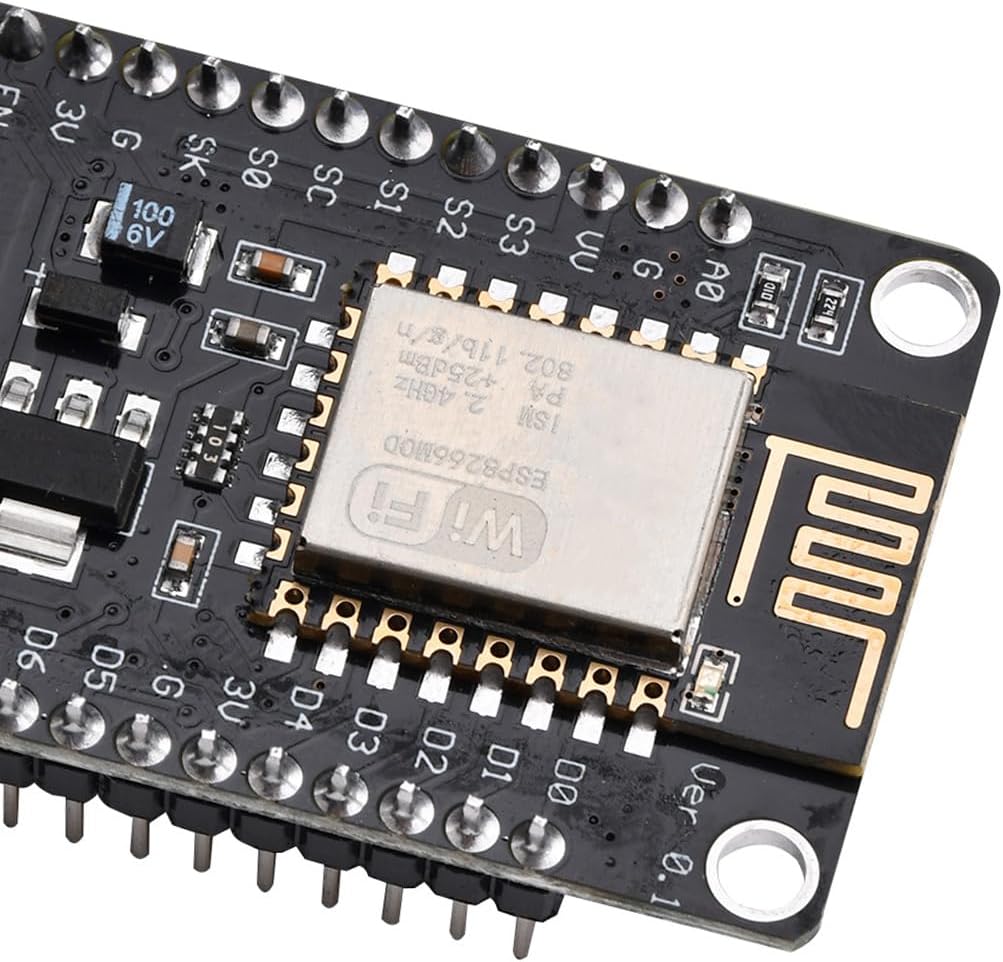
For the temperature sensors i used some DS18B20 sensors with the breakout board with the resistor inplace. This made it nice and simple to wire them to the ESP8266’s .
As i needed to be able to control the heatlamp i also needed an extension which could be turned on and off remotely. Im moving all my remote sensors to zigbee so figured id use a zigbee enabled extension this was also super handy as it had the USB ports to power the ESP8266’s.
Theres also the Raspberry Pi and i also got the camera module and an extension ribbon cable. While this isnt in use quite yet, its there ready to go when i get around to printing the parts i need.
The final part to this is 3D printing the DIN Rails and DIN mounts. For this i used Hatchbox PETG. This was all printed on my RatRig vcore3.1 500 and my Voron 0.2.
Software Used
There isnt much to the software section. The firmware for the ESP8266’s just grabs the data from the sensor then sends them to the MQTT server on my homeassistant instance.
I wont go into the install of mosquitto on homeassistant as its available in the addons store.
The trickiest part is getting the firmware installed on the ESP8266.
ESP8266 Setup
The first thing we need to do is install some additional libraries, the libraries required are:
- async-mqtt-client - This one is outside of the arduino repo
- ESPAsyncTCP - This one is outside of the arduino repo
- DS18B20 Temperature Sensor Libraries
To install the sync-mqtt-client and ESPAsyncTCP libraries we need to do the following:
- Download the zips from the links above. You should have a .zip folder in your Downloads folder.
- Unzip the .zip folders and you should get a folder named
libraryname-master - Rename them to just
librarynamefor both. So ESPAsyncTCP-master becomes ESPAsyncTCP. - Move them both to Arduino IDE installation libraries folder
- Re-open arduino ide.
For the DS18B20 Temperature Sensor Libraries we can use the library repo in Arduino IDE, first search for onewire and install OneWire library by Paul Stoffregen.
Then search for Dallas and install DallasTemperature library by Miles Burton.
Now we just need to put the firmware on the ESP8266’s. This is the firmware:
1
2
3
4
5
6
7
8
9
10
11
12
13
14
15
16
17
18
19
20
21
22
23
24
25
26
27
28
29
30
31
32
33
34
35
36
37
38
39
40
41
42
43
44
45
46
47
48
49
50
51
52
53
54
55
56
57
58
59
60
61
62
63
64
65
66
67
68
69
70
71
72
73
74
75
76
77
78
79
80
81
82
83
84
85
86
87
88
89
90
91
92
93
94
95
96
97
98
99
100
101
102
103
104
105
106
107
108
109
110
111
112
113
114
115
116
117
118
119
120
121
122
123
124
125
126
127
128
129
130
131
132
133
134
135


#include <OneWire.h>
#include <DallasTemperature.h>
#include <ESP8266WiFi.h>
#include <Ticker.h>
#include <AsyncMqttClient.h>

#define WIFI_SSID "REPLACE_WITH_YOUR_SSID"
#define WIFI_PASSWORD "REPLACE_WITH_YOUR_PASSWORD"

// Raspberri Pi Mosquitto MQTT Broker
#define MQTT_HOST IPAddress(192, 168, 1, XXX)
// For a cloud MQTT broker, type the domain name
//#define MQTT_HOST "example.com"
#define MQTT_PORT 1883

// Temperature MQTT Topics
#define MQTT_PUB_TEMP "esp/ds18b20/temperature"

// GPIO where the DS18B20 is connected to
const int oneWireBus = 4;
// Setup a oneWire instance to communicate with any OneWire devices
OneWire oneWire(oneWireBus);
// Pass our oneWire reference to Dallas Temperature sensor
DallasTemperature sensors(&oneWire);
// Temperature value
float temp;

AsyncMqttClient mqttClient;
Ticker mqttReconnectTimer;

WiFiEventHandler wifiConnectHandler;
WiFiEventHandler wifiDisconnectHandler;
Ticker wifiReconnectTimer;

unsigned long previousMillis = 0;   // Stores last time temperature was published
const long interval = 10000;        // Interval at which to publish sensor readings

void connectToWifi() {
  Serial.println("Connecting to Wi-Fi...");
  WiFi.begin(WIFI_SSID, WIFI_PASSWORD);
}

void onWifiConnect(const WiFiEventStationModeGotIP& event) {
  Serial.println("Connected to Wi-Fi.");
  connectToMqtt();
}

void onWifiDisconnect(const WiFiEventStationModeDisconnected& event) {
  Serial.println("Disconnected from Wi-Fi.");
  mqttReconnectTimer.detach(); // ensure we don't reconnect to MQTT while reconnecting to Wi-Fi
  wifiReconnectTimer.once(2, connectToWifi);
}

void connectToMqtt() {
  Serial.println("Connecting to MQTT...");
  mqttClient.connect();
}

void onMqttConnect(bool sessionPresent) {
  Serial.println("Connected to MQTT.");
  Serial.print("Session present: ");
  Serial.println(sessionPresent);
}

void onMqttDisconnect(AsyncMqttClientDisconnectReason reason) {
  Serial.println("Disconnected from MQTT.");

  if (WiFi.isConnected()) {
    mqttReconnectTimer.once(2, connectToMqtt);
  }
}

/*void onMqttSubscribe(uint16_t packetId, uint8_t qos) {
  Serial.println("Subscribe acknowledged.");
  Serial.print("  packetId: ");
  Serial.println(packetId);
  Serial.print("  qos: ");
  Serial.println(qos);
}

void onMqttUnsubscribe(uint16_t packetId) {
  Serial.println("Unsubscribe acknowledged.");
  Serial.print("  packetId: ");
  Serial.println(packetId);
}*/

void onMqttPublish(uint16_t packetId) {
  Serial.print("Publish acknowledged.");
  Serial.print("  packetId: ");
  Serial.println(packetId);
}

void setup() {
  sensors.begin();
  Serial.begin(115200);
  Serial.println();

  wifiConnectHandler = WiFi.onStationModeGotIP(onWifiConnect);
  wifiDisconnectHandler = WiFi.onStationModeDisconnected(onWifiDisconnect);

  mqttClient.onConnect(onMqttConnect);
  mqttClient.onDisconnect(onMqttDisconnect);
  //mqttClient.onSubscribe(onMqttSubscribe);
  //mqttClient.onUnsubscribe(onMqttUnsubscribe);
  mqttClient.onPublish(onMqttPublish);
  mqttClient.setServer(MQTT_HOST, MQTT_PORT);
  // If your broker requires authentication (username and password), set them below
  //mqttClient.setCredentials("REPlACE_WITH_YOUR_USER", "REPLACE_WITH_YOUR_PASSWORD");

  connectToWifi();
}

void loop() {
  unsigned long currentMillis = millis();
  // Every X number of seconds (interval = 10 seconds)
  // it publishes a new MQTT message
  if (currentMillis - previousMillis >= interval) {
    // Save the last time a new reading was published
    previousMillis = currentMillis;
    // New temperature readings
    sensors.requestTemperatures();
    // Temperature in Celsius degrees
    temp = sensors.getTempCByIndex(0);
    // Temperature in Fahrenheit degrees
    //temp = sensors.getTempFByIndex(0);

    // Publish an MQTT message on topic esp/ds18b20/temperature
    uint16_t packetIdPub1 = mqttClient.publish(MQTT_PUB_TEMP, 1, true, String(temp).c_str());
    Serial.printf("Publishing on topic %s at QoS 1, packetId: %i ", MQTT_PUB_TEMP, packetIdPub1);
    Serial.printf("Message: %.2f \n", temp);
  }
}
Wiring up the Sensor
This is just 3 wires, 2 power 1 data.
We connect the data line to GPIO4 (Pin D2) Then positive to 3.3v and ground to gnd.
This is assuming you use the same breakout board i used. This already includes the resistor otherwise you will to wire that in. Id highly recommend just grabbing the breakout board though.
End Result
Ill find the links to the 3D printed DIN rails, mounts and enclosures. The enclosures contain the sensor breakout boards. I hot glued the boards in place in the enclosure and added some glue around where the sensor wire leaves it just to try an prevent the cables getting pulled out.
I can see the data in homeassistant after adding the sensor via adding an MQTT device.