Using FreeIPA to authenticate OpenVPN Users on PfSense
I have been fiddling with multiple different authentication methods to centralise the authentication across all my devices and services. Im trying to push myself to use FreeIPA more as it seems to be becoming more widley used where using Active Directory isnt suitable. It is also really easy to enable 2FA per user which i find to be a big bonus. If you havnt already setup FreeIPA, check out my guide on going through the installation process Here.
FreeIPA group
The first thing i needed to do was to create a group within FreeIPA which will tell pfSense whether that user is allowed to VPN in. This is fairly simple, just log into your FreeIPA server’s web interface and go to Identity and then User Groups then press Add on the right hand side. Fill out the details like the image below.
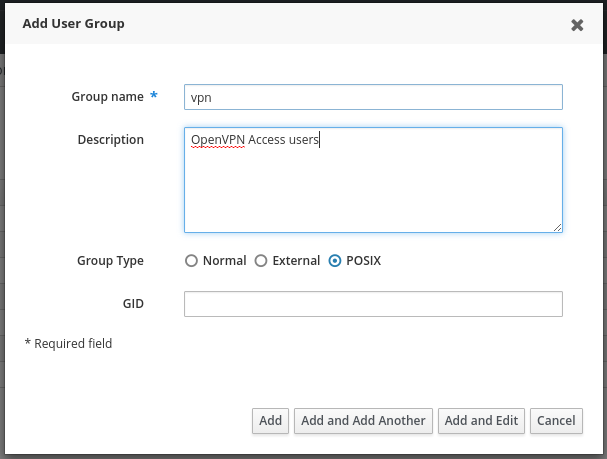
Then press Add. You will need to remember to add your user to the group.
Thats all that you need to do in FreeIPA for now. Next we need to configure pfSense.
Adding the FreeIPA server as an Authentication Server in pfSense
Now we need to tell pfSense to use this server to authenticate against. First we need to add the FreeIPA Certificate Authority to pfSense. We will need to grab this cert from FreeIPA.
In the FreeIPA web interface, go to Authentication then Certificates, you should get something similar to this:
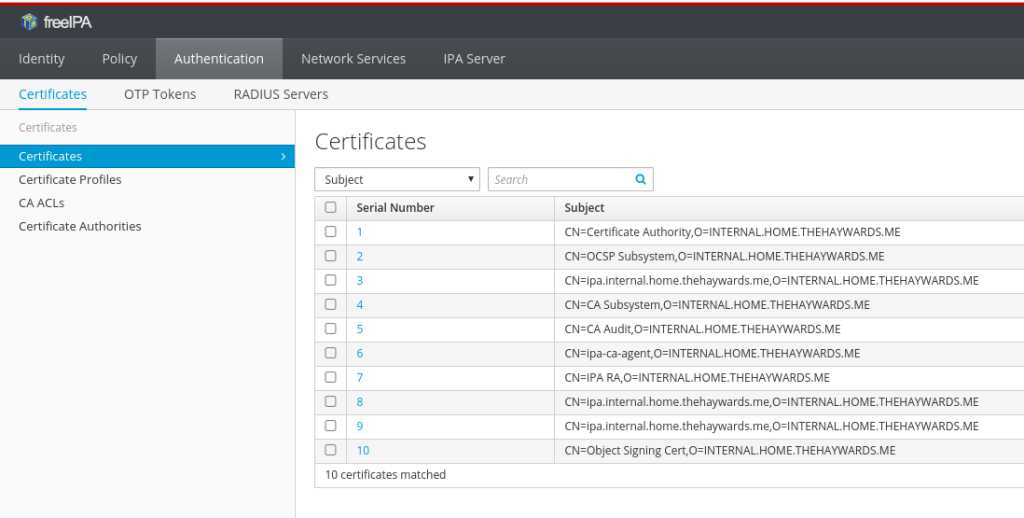
The one we need is the top one. So click on the Serial Number (1 in this case), this will take you to another page with an overview of the certificate details.
On this page, click Action then select Download.
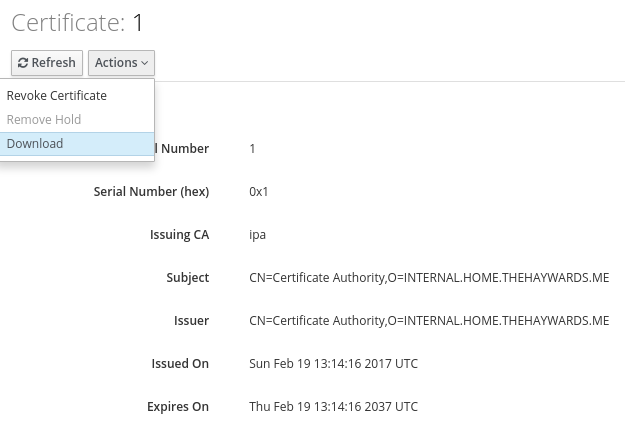
Now that you have downloaded the cert, open it up in a basic text editor and copy everything from it, including the -----BEGIN CERTIFICATE----- and -----END CERTIFICATE-----.
Now we need to add the CA to pfSense. Log into the web interface of you pfSense box then go to System then Cert. Manager, on the CA’s tab click on the Add Button. This will take you to another page.
Add in the details like in the following image. It is in the Certificate Data box that you need to paste the contents from the certificate we downloaded earlier.
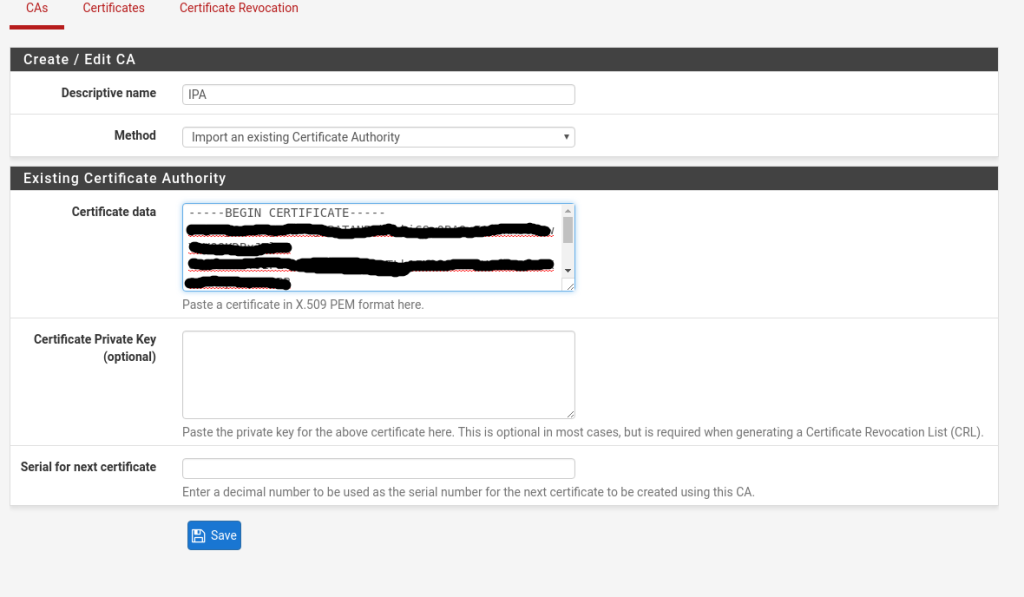
Once you are done, just press save.
Adding the Authentication Server
If you are already pretty familiar with LDAP then this should be pretty simple for you. In this section ill go through adding the FreeIPA server as an auth backend, and testing it.
In the pfSense web interface, go to System then User Manager then select the Authentication Servers tab. This will take you to another page, press Add at the bottom.
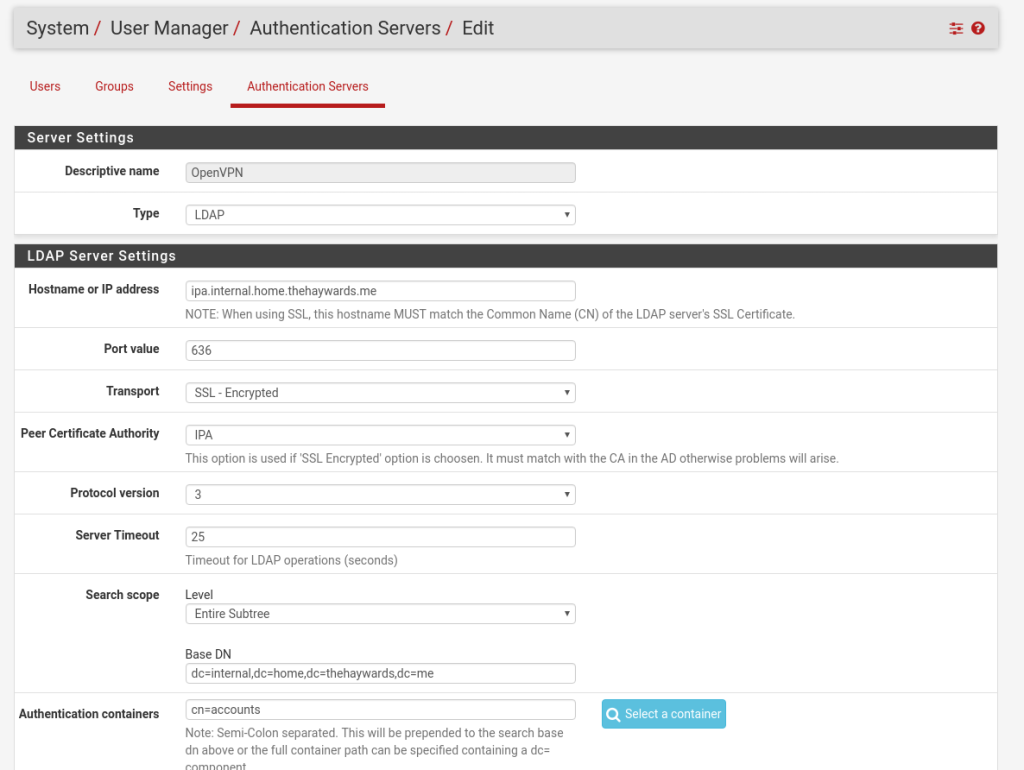
There is quite a lot of info required here. Ill add an image of my setup at the end, but will add it in text as well so you can copy/paste the bits you need (and obviously change them to suit your environment).
Descriptive name: Just a name for your reference
Type: LDAP
Hostname or IP Address: Hostname or IP of your FreeIPA Server
Port Value: 636
Transport: SSL – Encrypted
Peer Certificate Authority: The name you set in the “Adding the CA Cert” section
Protocol version: 3
Server Timeout: 25
Search Scope Level: Entire Subtree
Base DN: Your FreeIPA Base DN
Authentication Containers: cn=accounts
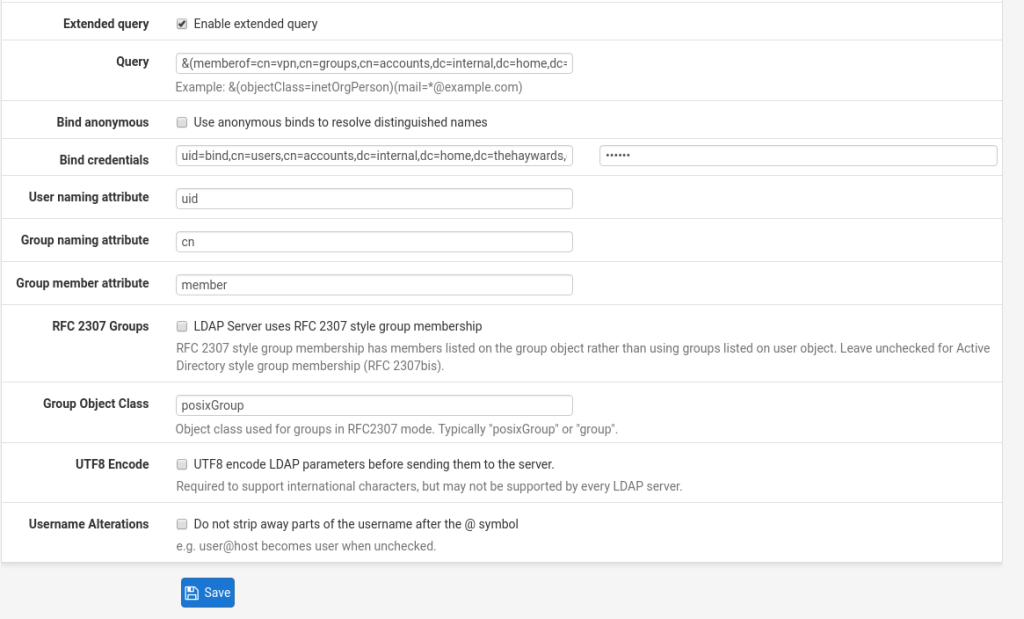
Extended Query: Ticked
Query: &(memberof=cn=vpn,cn=groups,cn=accounts,dc=internal,dc=home,dc=thehaywards,dc=me) (obviously changing this to come into line with your own Base DN.)
Bind anonymous: Unticked
Bind Credentials: I used a system user here. You could create a user to bind with though.
User naming Attribute: uid
Group naming Attribute: cn
Group member Attribute: memberof
RFC 2307 Groups: Unticked
Group Object Class: posixGroup
UTF8 Encode: Unticked
Username alterations: UntickedThen press Save.
Here are some screenshots of my setup.
Testing the new backend
That should be the configuration completed, next we need confirm it is actually working. There are a couple of tests i usually do to make sure it is working as it should be, these are:
- Login with a user in the VPN group and with the correct Credentials
- Login with a user in the VPN group with incorrect Credentials
- Login with a user not in the VPN group with the correct Credentials
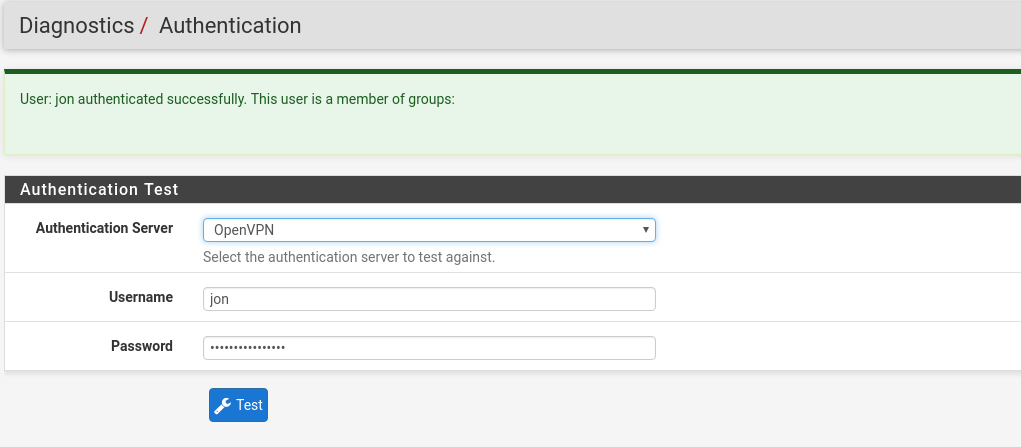
Doing these 3 tests will confirm that our extended query is working correctly and that only users with valid credentials AND in the VPN group can connect. The authentication test page does make it explicitly clear when authentication has worked. Here are examples of a successful login and failed login
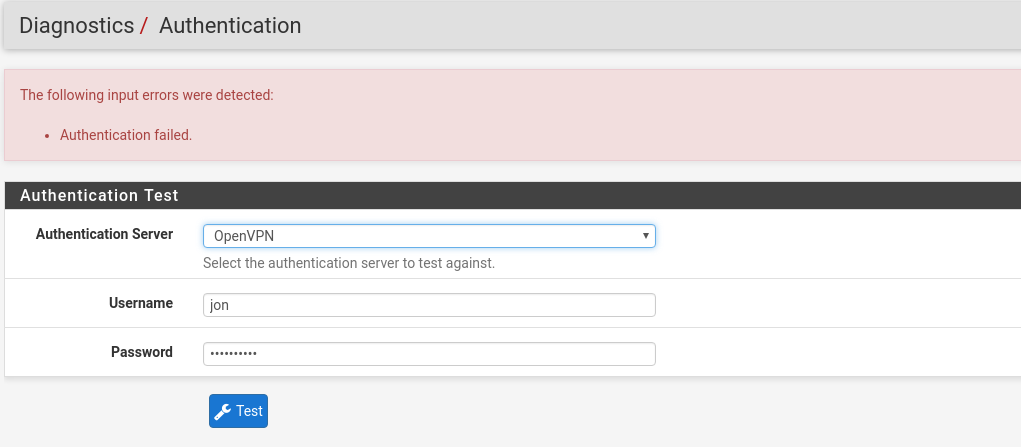
(It failed as i didnt provide my MFA token)
Once you are happy your user is able to login, we need to go through the final section which is to tell the OpenVPN server to use the FreeIPA server for authentication.
Setting FreeIPA as the OpenVPN Authentication backend
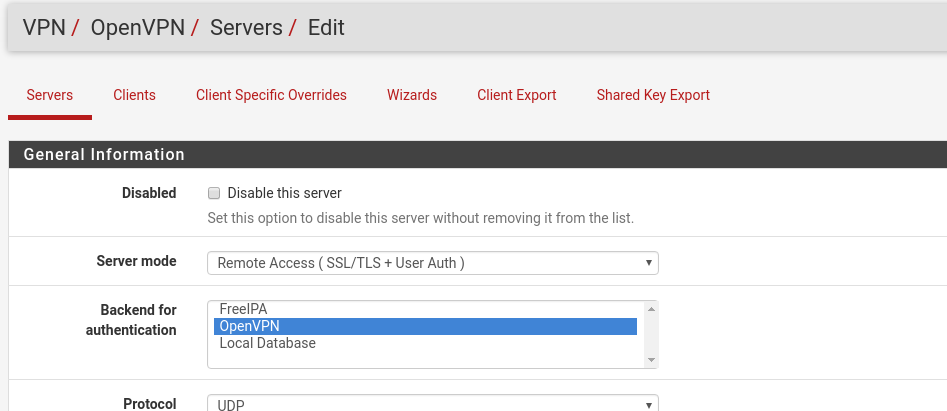
This is a quick and simple change. In the pfSense interface, go to VPN then OpenVPN. On the Servers tab, click the Edit button next to the server we are changing.
Change the Backend For Authentication to the name you gave the server in the Adding the authentication server section. Once done, press save. Here is how mine now looks:
That should be complete now. Test it and see!